

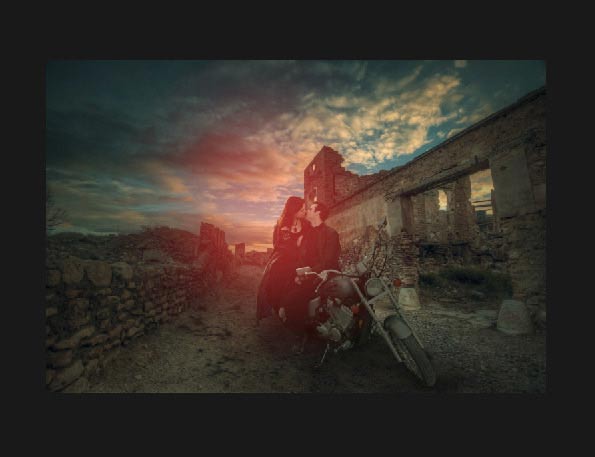
How To Make A Sunset In Photoshop
In this Photoshop tutorial, we'll larn how to create a dramatic sunset scene in Photoshop. We'll first a create a basic scene using single landscape stock so we'll create a dusk atmosphere. Subsequently that, we'll add models to the scene and then we'll blend them by creating shadows and refining the low-cal and shade on the model. At the end, we'll finish it upwards by creating golden sunset scene and using aligning layers.
Tutorial Resources
- Mural
- Models
- Birds Brushes
Preparing Background
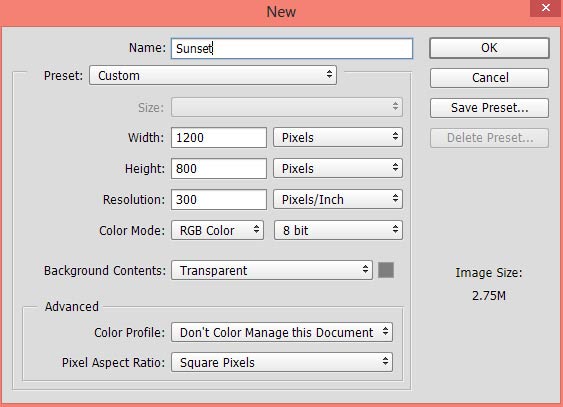
Stride 1
Create a new document in Photoshop with following settings or feel free to choose your ain settings.
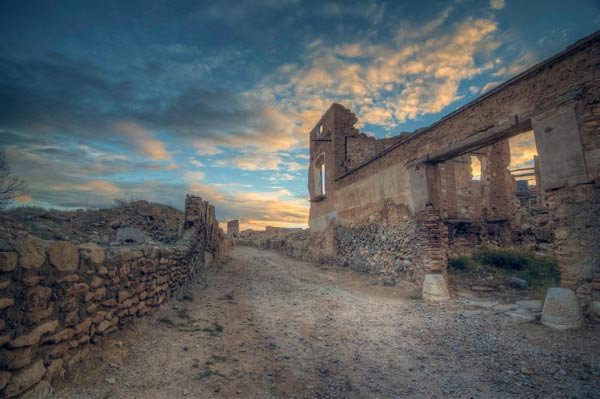
Pace 2
Identify the landscape paradigm to main certificate by selecting Place > Identify Embedded. If needed don't forget to use Transform Tool (CTRL + T) to arrive fit nicely to primary document.
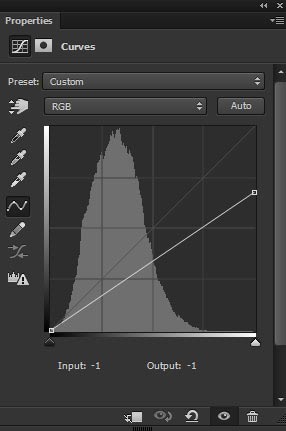
Step iii
Click the third icon at the lesser of layer panel and add together Curves adjustment layer. At present reduce the brightness and make the landscape darker.
On the layer mask of Curves, use a soft round black brush to erase the effect on the middle as I aim to make calorie-free source at that place. Mask the outcome on the highlighted area.
Results after maintaining light on the center:
Step 4
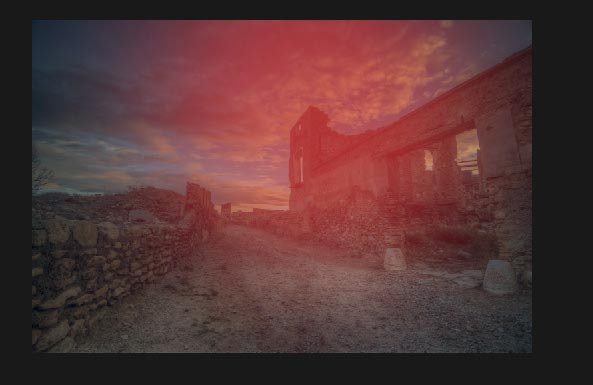
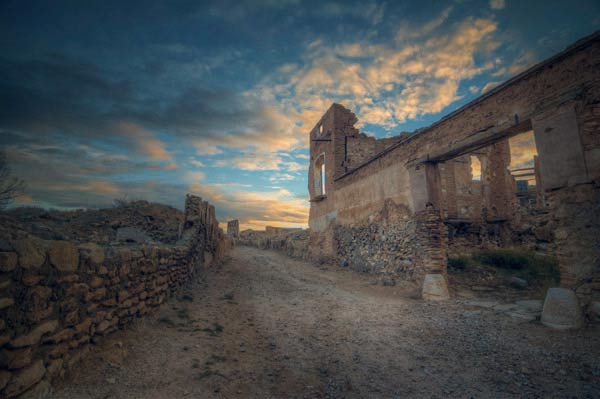
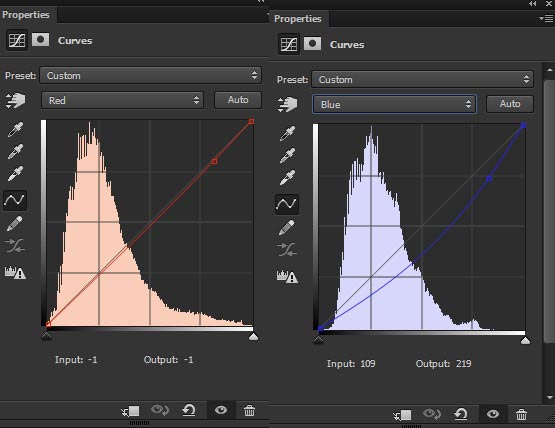
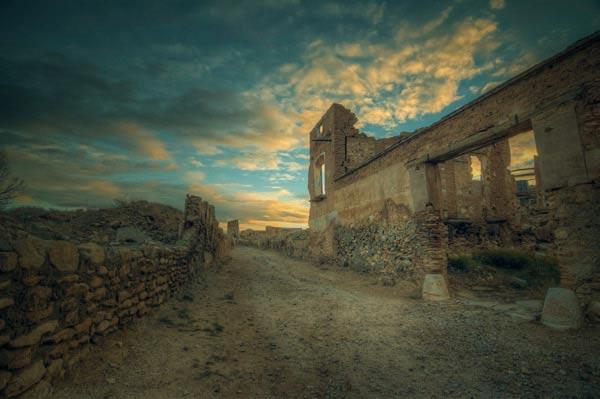
Make a Curves adjustment layer again. This time use the Red and Blue channel to add yellow colour tones to landscape.
Reduce the opacity to lxx%. Here are the results :
Step five
Add a Black/White aligning layer and fix its blend mode to Soft Calorie-free. This will boost the contrast of entire scene.
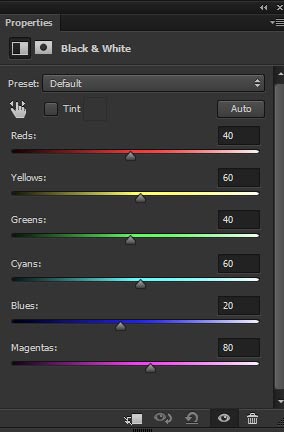
Results:
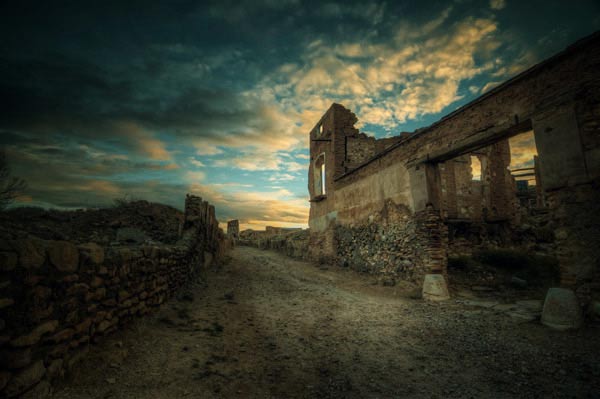
Pace six
Due to Black/White adjustment layer, we got dark corners and I don't want that. On the layer mask, I erased the issue at the corners using a soft circular blackness brush and but continue the effect on the middle of the background.
Here is the image for reference:

Results:
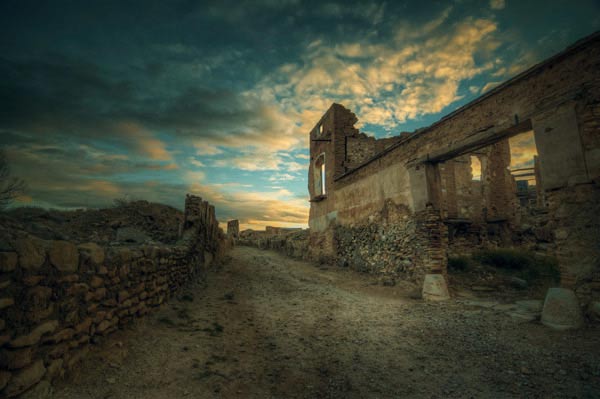
Hither y'all can see the results on layer mask:

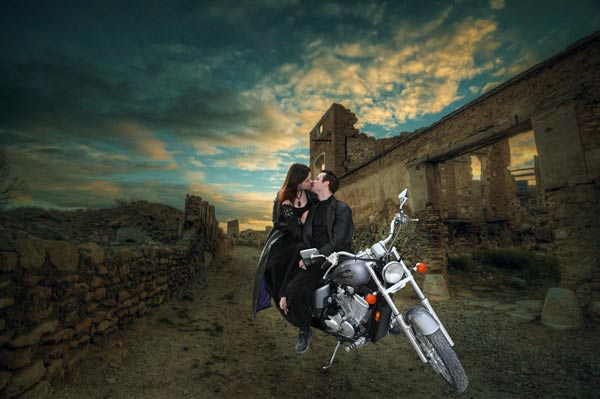
Add the Models
Step vii
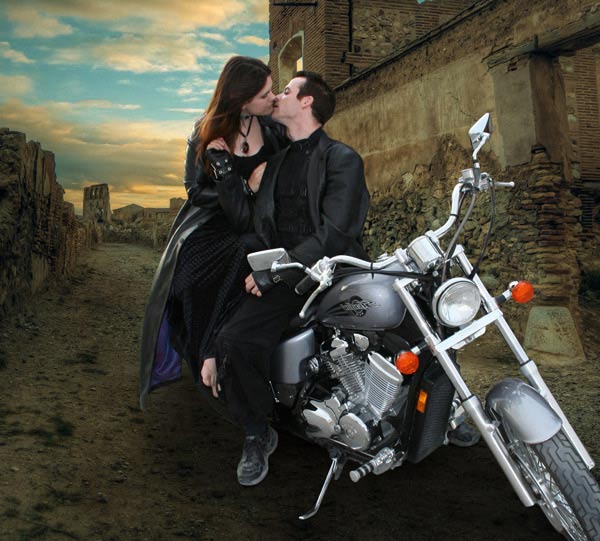
Excerpt the models from the groundwork and place them to the main certificate. Accept y'all fourth dimension while making the selection, probably the most time-consuming step in this tutorial. One time yous extracted the models so place them equally shown below.
Step 8
Create a new layer under the model layer and name it 'shadow i'. Now using soft blackness brush paint some bandage shadows nether the bike, model's anxiety, under the cycle stand up and tyre. Use a soft round black castor with opacity and flow about thirty-40% for painting shadow.
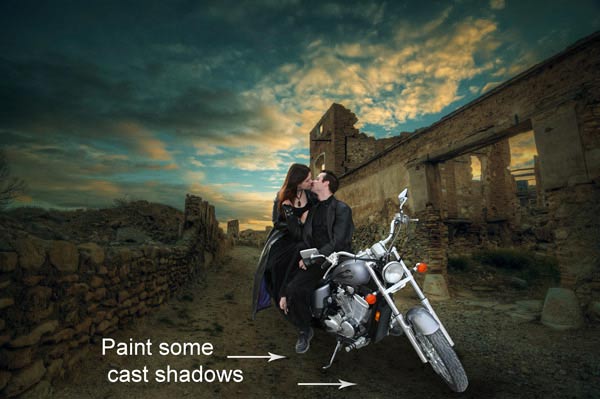
On a new layer, I painted some more cast shadows as indicated by the pointer.
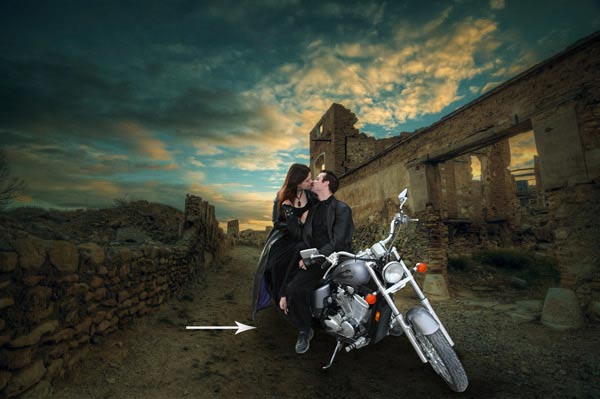
I created one more layer and this fourth dimension I painted contact shadows (mostly under the shoes and wheel's engine).
I devoted a full tutorial for a beginner on how to paint realistic shadows and that is why the higher up steps (shadow creating) are directly forwards. And so it'southward pointless to do the same affair again and again in particular.
Step ix
Make a Curves adjustment layers for models and reduce the brightness. Use this layer every bit a Clipping Mask (printing the red icon).
I maintained the brightness on the highlighted red parts as nosotros aim to create light source there. Use a soft round black castor to erase the consequence on the layer mask.
Results:

Step 10
Brand a Color Balance adjustment layer and add more colors to models to match the colors with the background.
Results:
Step 11
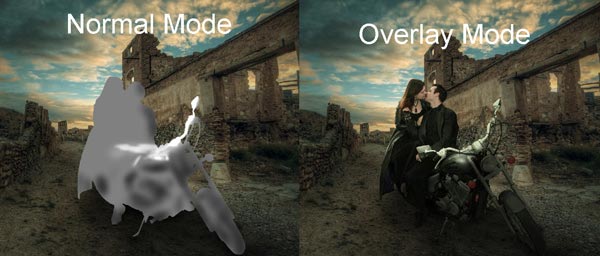
Create a new layer and fill this layer with 50% gray color, change the blending mode to Overlay. Go to Layer > New Layer and requite the following values.

Activate the Contrivance Tool (O) with Midtones Range, Exposure about 9-12% to refine the low-cal and shade on the models. Use the Dodge Tool (O) to bring more low-cal at the height middle parts. Similarly use the Burn down Tool (O) to strengthen shade to those parts which are less illuminated by the light source similar on the legs, lesser cloths, tyres, engine, headlights and many other areas.
See the below image for results in both modes.
Results so far:

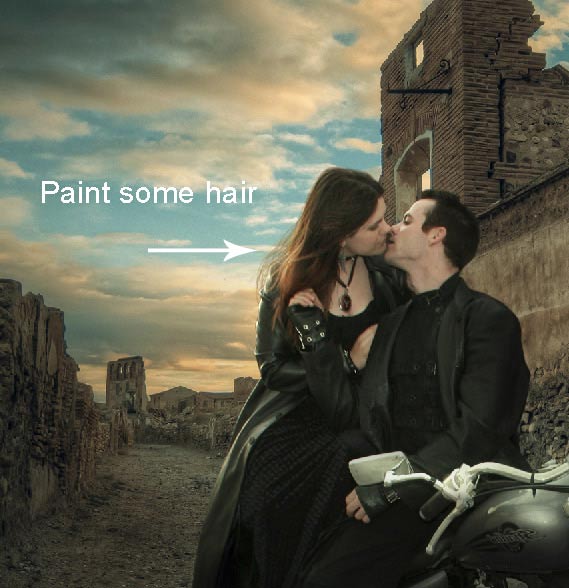
Step 12
Create a new layer and proper name it 'pilus'. Actuate the Brush Tool (B). Set up the foreground colour to #fcda73. Now using soft circular brush, with hardness set to 30%, pigment some lighter hair strands.
Using birds brushes paint some birds as shown beneath.
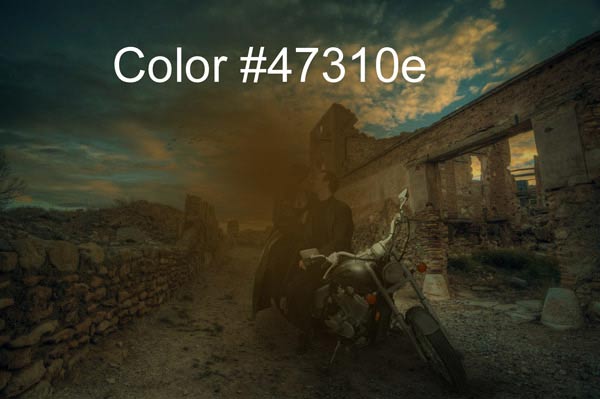
Step 13
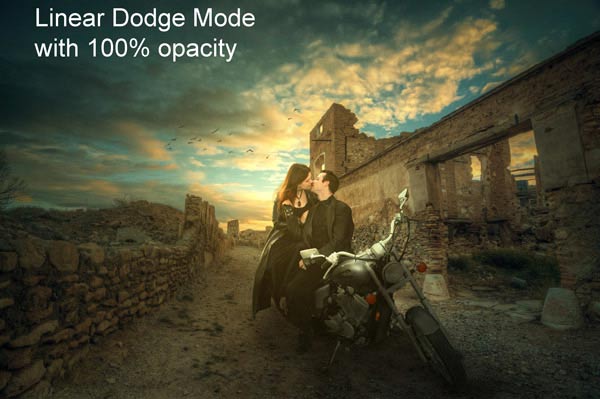
Create a new layer and name information technology 'light'. Set the foreground color to #47310e. Paint the calorie-free as shown below using soft round brush.
Set the blending fashion to Linear Dodge.
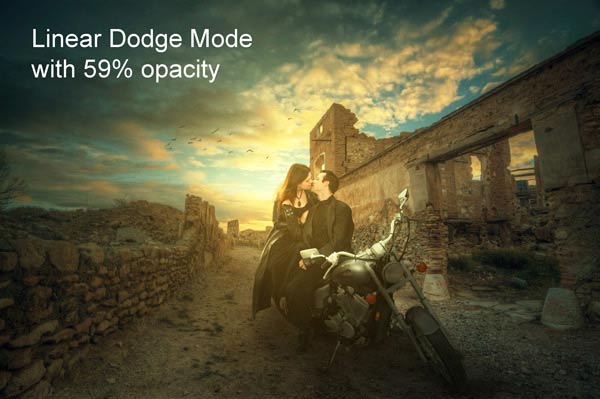
Pace 14
Indistinguishable light 1 layer for stronger light consequence. This fourth dimension reduce its opacity to 59%.
Final Adjustments
Stride 15
Add a Gradient Map aligning layer and use the default blackness/white gradient from the gradient presets.
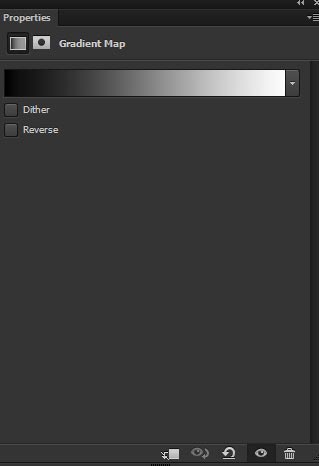
Fix the blending mode to Soft Light and reduce the opacity to 30%.
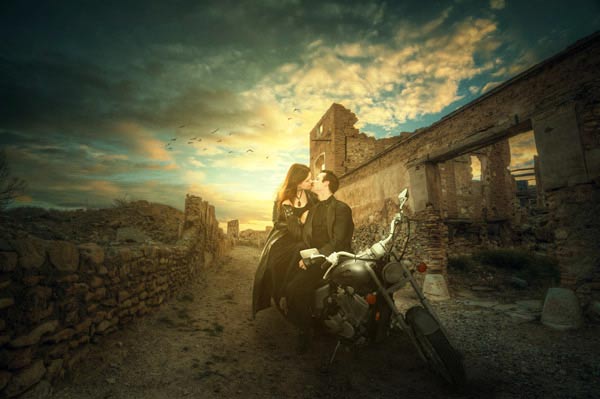
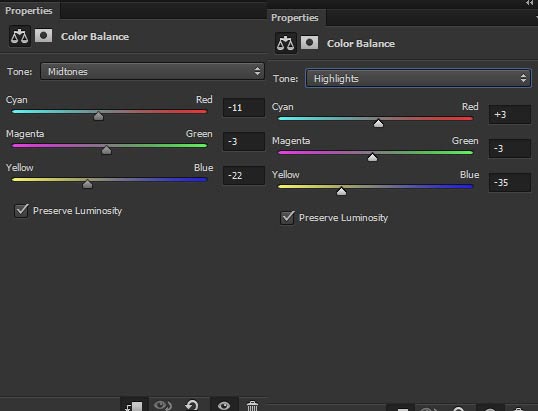
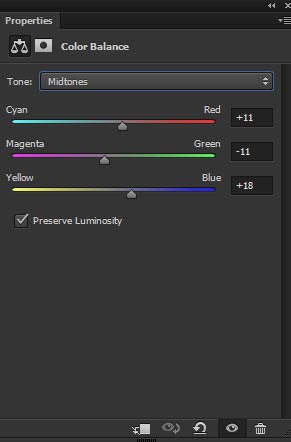
Step sixteen
If you are happy with the results then you can quit here. But I want golden dusk tones for the scene. I used a Color Balance adjustment layer to achieve that.
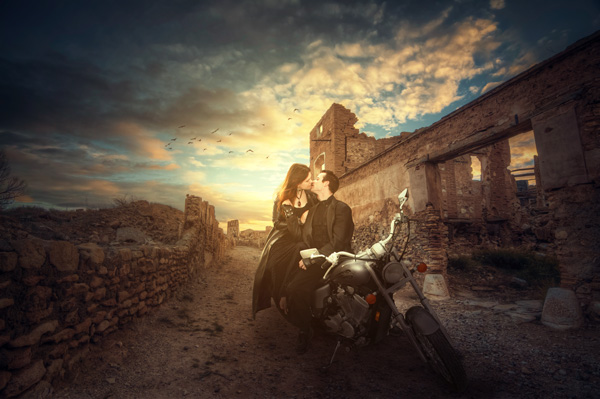
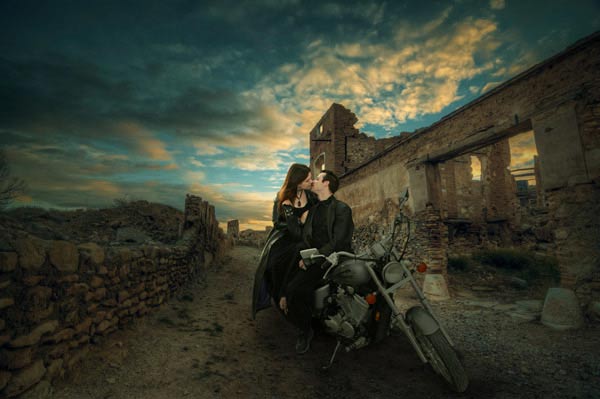
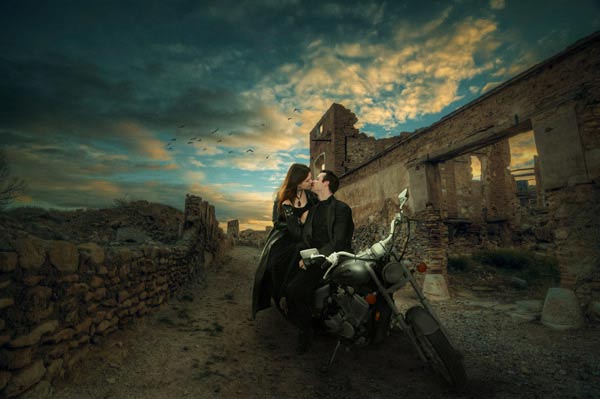
Final Results:
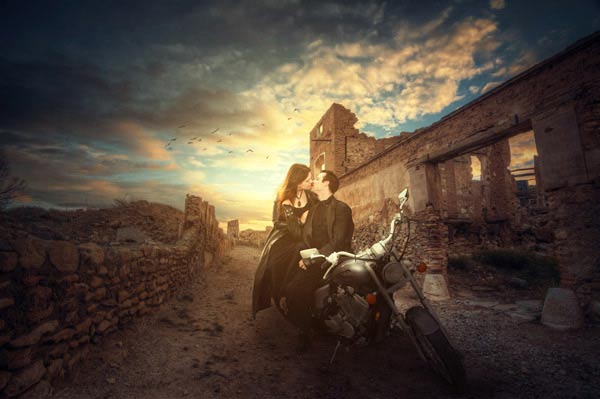
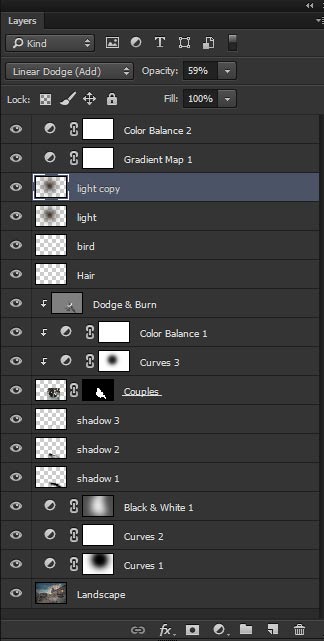
Layer Console Bundled:
Conclusion
Thank for following the tutorial. So these are techniques for creating a dramatic sunset scene in Photoshop. If you similar the tutorial then do share with the world, just press the social media icon on your screen. Have a keen mean solar day and keep Photoshopping!
Source: https://www.psdstack.com/photoshop-tutorials/photo-manipulation/dramatic-sunset-photoshop-tutorial/
Posted by: smithhakis1990.blogspot.com
0 Response to "How To Make A Sunset In Photoshop"
Post a Comment