

How To Apply Negetive Filter Photoshop

Neutralizing Color Casts With The Photo Filter In Photoshop
In this Photoshop photo editing tutorial, nosotros're going to look at how to quickly neutralize a color cast in a photo using Photoshop's Photo Filter aligning.
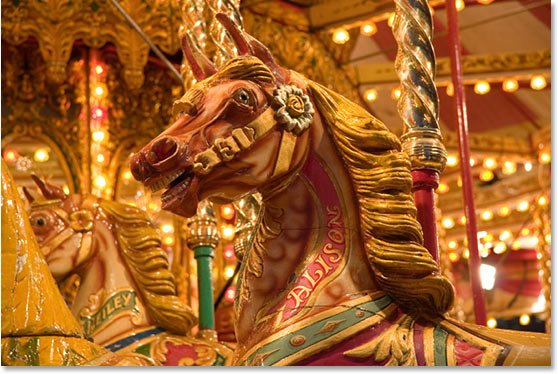
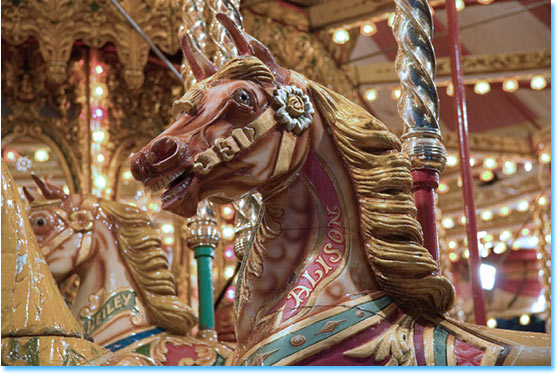
Hither's the image I'll be using for this tutorial, which has quite an obvious orange colour cast:
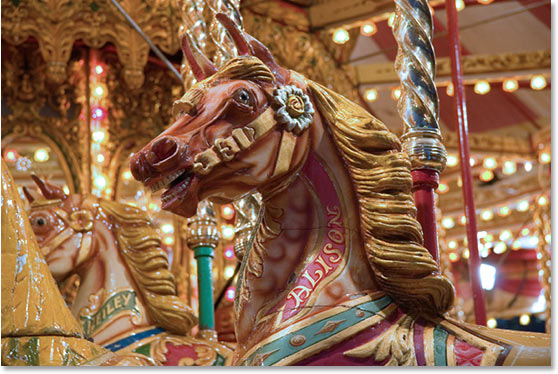
Here's how it will look after removing the color cast with the Photo Filter:
Let's become started!
Pace 1: Add A Photo Filter Adjustment Layer
With the image open up in Photoshop, the starting time thing we need to do is add together a Photo Filter adjustment layer. To do that, click on the New Adjustment Layer icon at the bottom of the Layers palette:
Click the "New Adjustment Layer" icon at the bottom of the Layers palette.
And then select Photo Filter from the listing:
Select "Photo Filter" from the list of Adjustment Layers.
This will bring upwardly the Photo Filter dialog box:

The "Photograph Filter" dialog box.
Step 2: Sample The Color You Want To Remove From The Image
Click on the color swatch to the correct of the word "Color" in the Photograph Filter dialog box:

Click on the color swatch.
This will bring up Photoshop's Color Picker:

Clicking the colour swatch brings up the Color Picker.
Rather than choosing a color from within the Colour Picker, move your mouse over the image, and you'll meet your mouse cursor change into the Eyedropper icon. We're going to sample the colour that's giving us our problem. To do that, click on an area within the epitome where the problem color is most noticeable. I'm going to click on the equus caballus'southward mane to sample the orange colour:
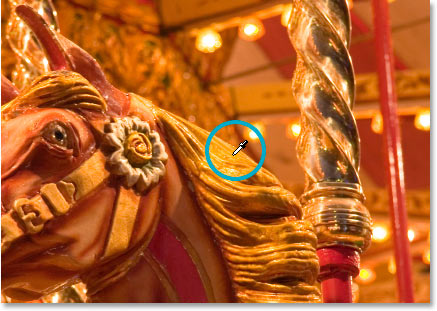
Click on the prototype to sample the problem color.
Don't leave out of the Color Picker yet. We're going to employ it to invert the sampled color next.
Step 3: Invert The Color In The Color Picker
In order to neutralize the colour cast, nosotros're going to invert the problem colour that nosotros only sampled, which will give us the exact opposite color. Nosotros tin can then use the Photo Filter to combine the inverted (opposite) color with the problem colour, which volition effectively abolish out the color cast. In order to do that, we first need to capsize the colour, and the easiest way to do that within the Color Picker is with the Lab color options, circled in red below:

The "Lab" options along the far right of the Color Picker.
Ignore the "Fifty" option, which stands for "Lightness", since we're non interested in changing any lightness values. All we want to do is change the color, which is controlled by both the a and b options. As we can encounter in the Color Picker to a higher place, the orange color I sampled from my image is fabricated from an "a" value of 26 and a "b" value of 79. Your numbers will most likely be different. To invert the color, all I need to do is add a negative ("-") sign in front end of both numbers, like and so:
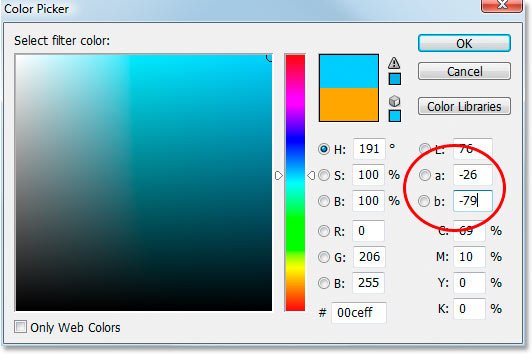
Add together a negative ("-") sign in front of the "a" and "b" values to invert the colour.
If you already had a negative sign in your "a" or "b" values, just remove it. So add a negative sign if there isn't one, and remove information technology if at that place is 1 to invert the color. We tin can see in the Color Picker above that my color has now changed to more than of a blue color, and that is the opposite of the orangish color I sampled. I can at present employ this colour to neutralize my color bandage.
Click OK when y'all're washed to exit out of the Color Picker.
Step 4: Drag The Density Slider To Remove The Color Cast
Back in the Photo Filter dialog box, I can run across that the color swatch is now showing my inverted color. All I need to practise at this point to remove the colour cast is drag the Density slider to the correct, which will determine how much of my inverted colour is existence blended into the image, until my image looks better. In my case, I don't want to remove the orangish completely because I retrieve it adds a bit of warmth to the paradigm, then I'll leave merely a hint of it in. I think a Density value of around 74% works best here:
Elevate the Density slider to the right until the color cast is removed.
Here'due south my image at this point:
The image after removing the orangish bandage with the density slider.
Footstep five: Heave The Colors With A Hue/Saturation Adjustment
The but problem now is that the colors are looking a little slow, so I'm going to fix that by boosting the colour saturation with a Hue/Saturation adjustment layer. To do that, click on the New Adjustment Layer icon one time again at the bottom of the Layers palette:
Click the "New Aligning Layer" icon at the bottom of the Layers palette.
This fourth dimension, cull Hue/Saturation from the list:
Select "Hue/Saturation" from the listing of Adjustment Layers.
This brings up the Hue/Saturation adjustment dialog box. I'm going to drag the Saturation slider in the middle towards the right to increase the colour saturation in the image. Keep an eye on your image to see a preview of what'southward happening as y'all drag. I'm going to drag mine to a value of nearly "+20":
Drag the "Saturation" slider towards the right to heave the colors in the prototype.
Click OK when you're done to exit out of the Hue/Saturation dialog box, and you're done! Hither, over again, is my original image:
The original prototype.
And here is the final issue afterward boosting the colors with Hue/Saturation:
The final upshot.
And there we take it! That'southward how easy it is to right a color cast problem using Photoshop's Photo Filter adjustment. Bank check out our Photo Retouching section for more Photoshop prototype editing tutorials!
Other Stuff
© 2022 Photoshop Essentials.com.
For inspiration, non duplication.
Site pattern by Steve Patterson.
Photoshop is a trademark of Adobe Systems Inc.
Source: https://www.photoshopessentials.com/photo-editing/photo-filter/
Posted by: smithhakis1990.blogspot.com
0 Response to "How To Apply Negetive Filter Photoshop"
Post a Comment